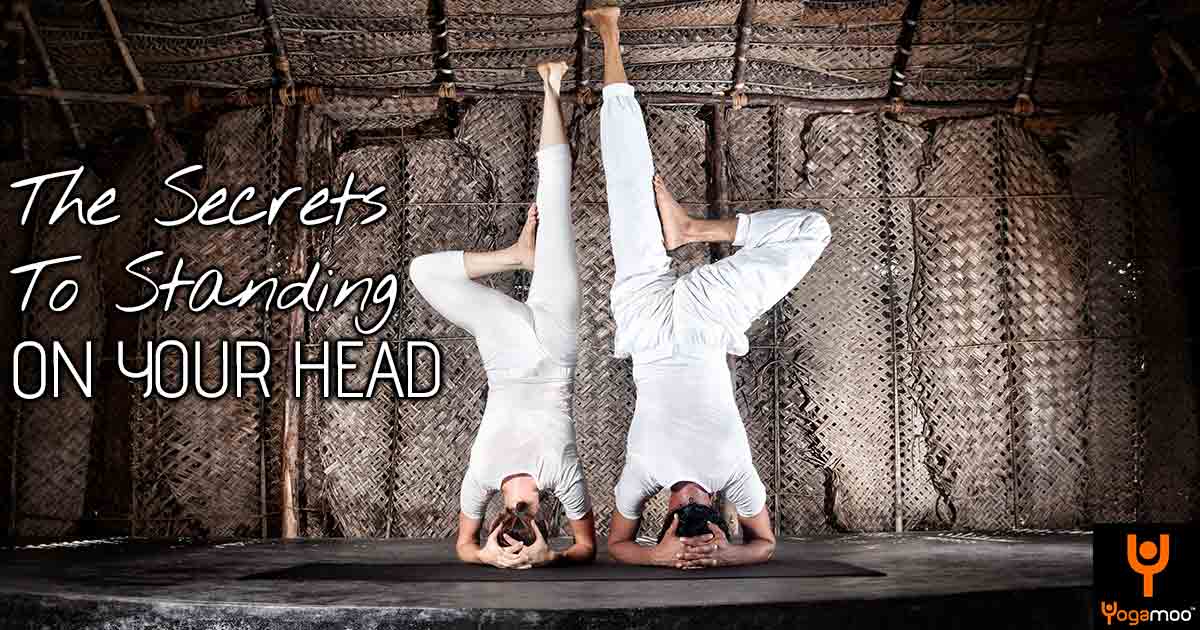
Headstand quite literally turns your world upside down. It forces you to change your perspective, to see things from a different point of view. The benefits of this asana are limitless. Often referred to as the “king” of yoga postures, headstand seems to encompass all the teachings of a yoga practice. Not just physically, but mentally and emotionally as well. Change your perspective, challenge your fears and find calm and stillness in the midst of physical and psychological demand? It certainly sounds like the king of all poses – revealing to us countless teachings of our yoga.
The elusive headstand is one of the most common postures that my students ask about. Not only is it a picture-perfect pose, but headstand provides many health benefits as well. Any inversions (headstand, handstand, even down dog and forward folds, etc.) are helpful for many reasons. Anytime your head is below your heart, you are technically in an inversion. And when your body is inverted, you are recirculating blood flow. Extremities can drain blood against gravity to flow back to the heart to be re-oxygenated and pumped back freshly to the limbs. You literally give your heart a moment to rest so that it does not need to pump blood against the ever-daunting forces of gravity. Inverting improves circulation, which stimulates and energises the mind. Inverting is also known to calm, relax and soothe as you focus on your breath and find stillness upside down. As if this were not enough, inverting also stimulates the lymphatic system, which can increase immunity and help prevent illness, it strengthens just about every muscle in the body leading to better posture and digestion, and it strengthens the lungs facilitating healthy breathing. Furthermore, inverting humbles its' practitioner while simultaneously building confidence. Now, headstand really seems to live up to its title as king, doesn’t it?
The following are simple steps that I teach my students to work toward and, ultimately, achieve headstand. It should be noted that although we often want to rush into cool postures such as headstand, we should always practice caution when working toward more advanced asanas. Headstand, in particular, places your neck in a very vulnerable position; so please, please make sure to master one step before moving on to the next. I know, I know…how frustrating! But, just as in life, when we are not prepared to move forward, we cannot possibly progress. So take your time. Take it in steps. Rome was not built in a day. Move forward when you are actually ready – not just when you want to. But, I promise, eventually, you will be ready for full headstand. Eventually. But there is no race to get there. Yoga is a practice. It is constantly changing. There are days when I can hold headstand for twenty minutes straight. And then there are days when I fall over before I even get my feet above my head. Yet, every day, I practice. Practice, practice, practice…eventually, headstand will come as a result. “Do your practice and all is coming.” – Sri K. Patthabi Jois.
There are many variations to the illustrious headstand, but here are seven steps to apply toward a standard Supported Headstand or Salamba Sirsana I.
Look out for the Inversion Workshop CLICK HERE FOR MORE DETAILS
1. Step One: Learn How To Fall Out Properly
The first thing I always teach to my students practising headstand is how to fall. Seems counterintuitive, I know, but it is super important to know how to fall without hurting yourself as this will, inevitably, arise on your quest to reach headstand. And falling is perfectly okay! In fact, in my opinion, falling strengthens us. First and foremost, it humbles us. Which is huge! Letting go of the ego in advanced asana practice is imperative to reach those poses. You will fall countless times. It is so cliché, but it’s not about the fall – it is about getting back up. Secondly, falling gives us courage. After that first time you fall out of headstand, you will realise that you survived! And that is a major epiphany. I find that the biggest block people have working toward any inversion is fear. Psychological factors are strong when you’re flipping upside down. I mean it feels almost unnatural to stand on your head. However, when you learn to fall out properly and carefully without any injury, you will have no more fear of going upside down because you always have an escape route. So, what is the proper exit strategy? A simple tuck and roll is my favourite exit. It seems to work across the board whether you're flexible or not, whether you're tall or short, etc. When you feel yourself starting to tip over, simply tuck your neck into your chest and roll forward. Try to pull yourself into as compact of a ball as possible. The more compact you are, the lighter the landing will be. Then, smile, breath for a moment in child's pose and, when you're ready, come right back up for either your second or your hundredth try.
2. Step Two: Rest on the CROWN of your Head
One of the most common mistakes I see in headstand is people placing the wrong part of their head on the mat. You want to be resting directly on the crown of your head. And how do you find the crown of your head? Place the crease of your wrist (the place where your wrist meets your palm) at your third eye centre (the space between your eyebrows) and then spread your fingers out long. Where your middle finger lands is the crown of your head. This is exactly where you want to place your weight. You don't want to lean too far forward toward your forehead or too far toward the back of your head. This is super important…set your foundation!
3. Step Three: Hug Your Elbows In
There is a huge tendency to spread the elbows out wide in headstand, which is exactly what you don't want to do. Just as in so many other yoga postures. ENJOY!!!
Check out the Inversions Workshop to really master the Secrets To Standing On Your Head…
![Inversions [WORKSHOP]](https://yogamoo.com/wp-content/uploads/2014/11/Inversions-Workshop-2.jpg)
Leave A Comment