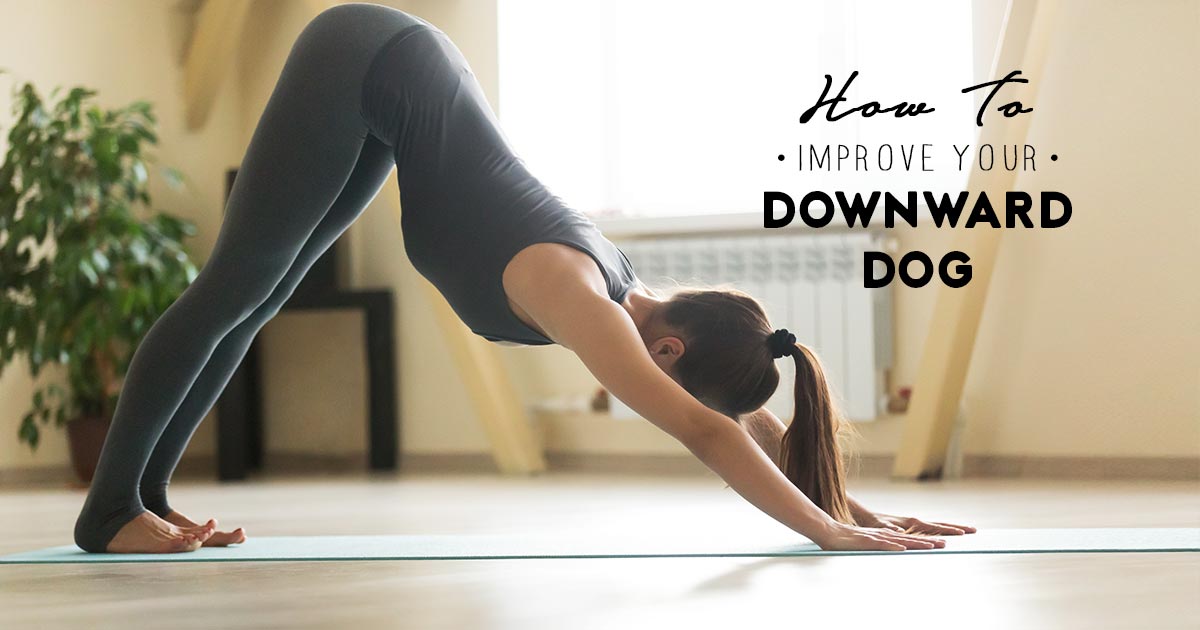
Downward Dog is an undeniable favourite in the yoga community. Everyone loves pitching up their tailbones and embracing the invigorating stretch throughout their entire body. Downward Dog also allows a lot of space in the body to play and move freely. But how is your alignment in Downward Facing Dog? Does your teacher continuously try to realign your hips and spine?
If your answer is yes, then continue reading to learn how to master your downward dog alignment.
Worry Less About Your Heels
First, let us get this out of the way. So many people are worried about stretching their heels to the floor that they scrunch up around the neck, stretch out so far they end up in some kind of awkward plank, or end up straining in places that may cause more than just slight discomfort.
You are allowed to keep your heels lifted in Downward Dog. The true focus should be the height of the tailbone and the length of the spine. The next thing your attention should go to in Downward Dog is the shoulders. Are they drifted towards your ears? If yes, you need to roll those blades back.
Now that those cues are out of the way, here are several more alignment tips to achieve your best Downward Facing Dog yet:
Hands are Shoulder-Width Apart
Never make your hands too narrow or too far apart, as this impinges the movement of your shoulder blades towards the spine. Weight bearing on the wrists also becomes an issue if the hands are not spaced shoulder-width apart. Think about aligning the crease of the wrist with the front edge of the mat then press all five fingertips into the mat.
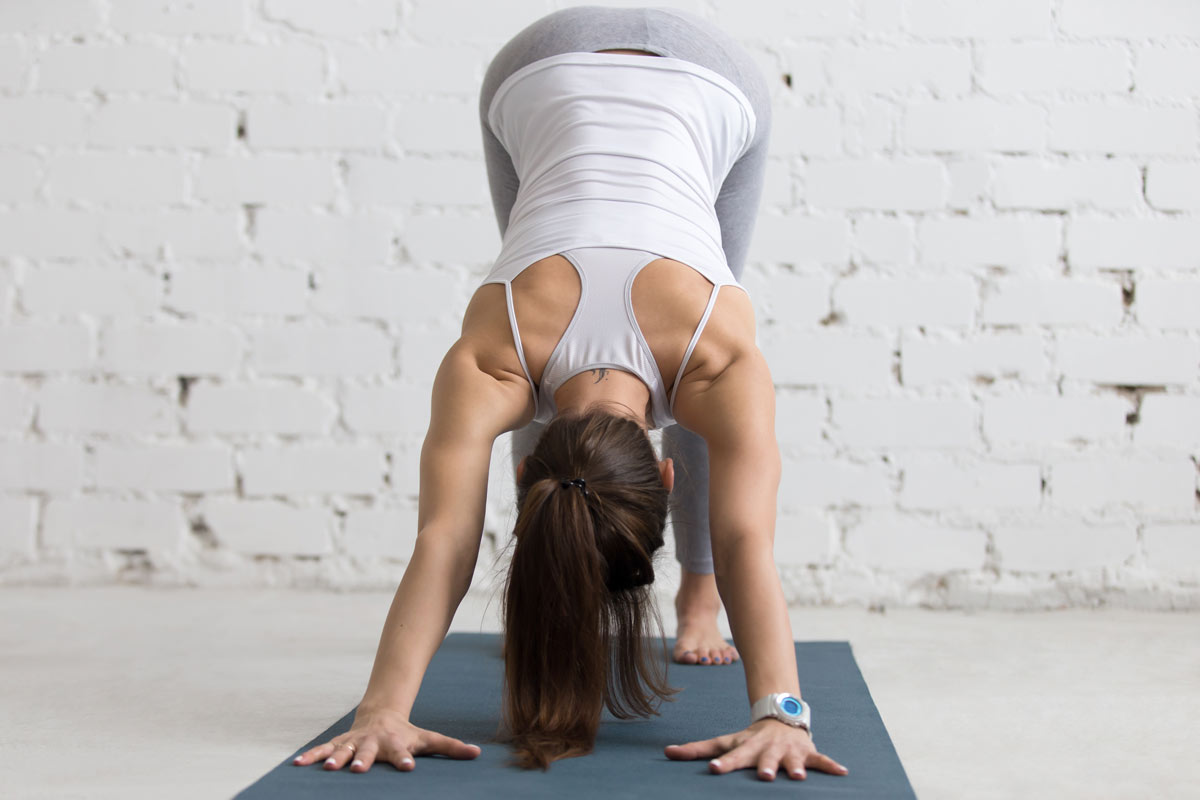
Feet are Hip-Distance Apart
As much as spacing is important with the hands, you also cannot forget about the distance of your feet. Many students always begin with wanting to spread their feet way too wide or keeping the heels together. Either way, this is going to make Downward Dog feel way more difficult than it should be.
Glance back between the knees to make sure that you do not see your heels. Keep them rotated up towards the sky.
Upper Arms Externally Rotate
Some teachers will cue this as rotating the crease of the elbow forward. Either way, isolating the external rotation of the upper arm is a bit tricky, so you might want to practice the movement outside of Downward Dog. The action is very subtle, but it makes a world of difference.
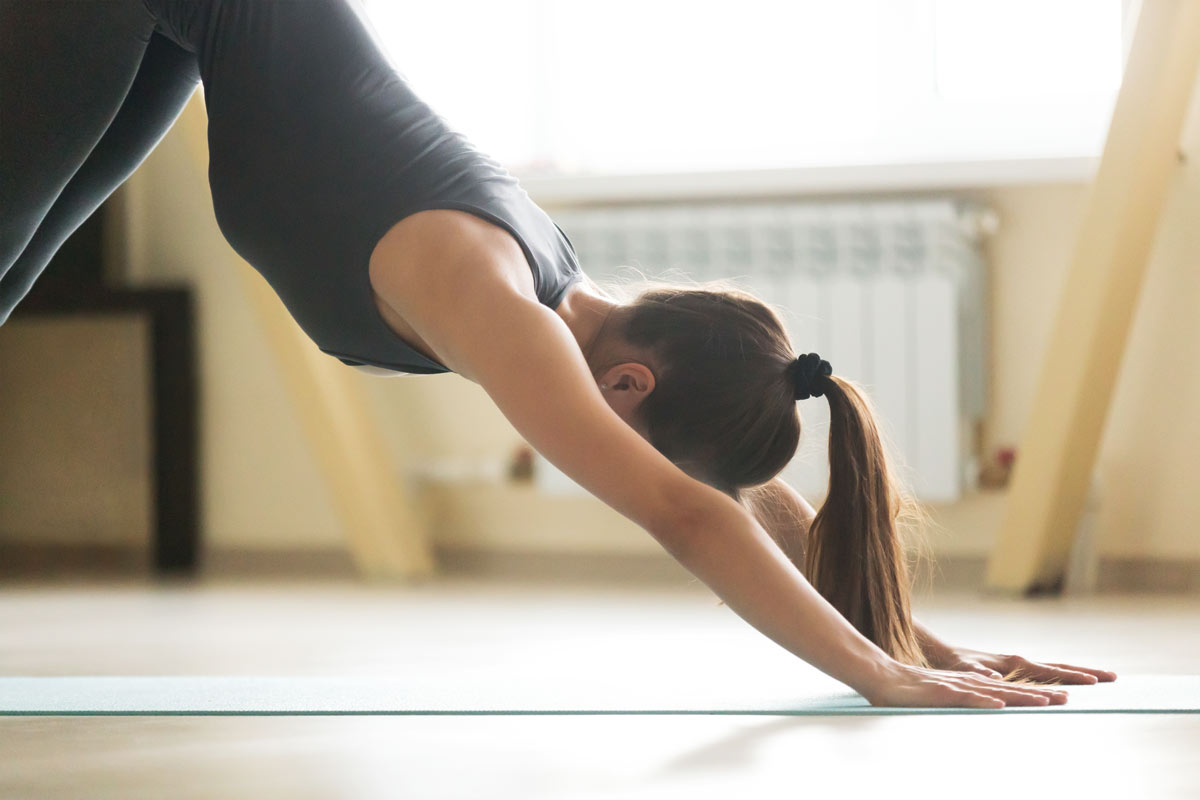
Crown of the Head, Neck, and Spine
Keeping the head, neck, and spine in a perfectly straight line is important. When you break the line, the body has a tendency to go catawampus. To achieve the correct spinal alignment, focus on keeping the head between the upper arms without letting it just hang there or get too stiff. It helps to look slightly forward, so you can just see the heels of your hands..
Firm the Core
Engaging the core, and more importantly, the pelvic floor is one way to float the tailbone even higher. Firm the core by drawing the navel towards the spine. This will also remove some weight from the shoulders. Keep the activation going strong while in Downward Dog.
There you have it: several tips to get better alignment in Downward Facing Dog!
When you finally achieve a perfectly aligned asana, the energy you feel will skyrocket. Enjoy the glory of Downward Facing Dog at its fullest!

Leave A Comment